When you first arrive on Plumelisse, the most useful thing is not only knowing what to write, but understanding how the application distributes the work. The whole interface is built around projects, then around several areas that interact with one another.
In other words, Plumelisse does not work like a simple blank page. The left column organizes your material, the center welcomes the writing itself, the right column helps you keep track of your reference points, and the timeline lays out the chronology. Once you understand that logic, the application opens up naturally.
1. Plumelisse is built around four areas
After signing in, you arrive in the main workspace. It is structured like this:
These areas are not isolated from one another. When you select a chapter in the left column, the editor loads that chapter, the right column adapts to that context, and the timeline can highlight events linked to that same chapter. That movement between the different areas is what defines how Plumelisse works.
2. The left column is where you build your project tree
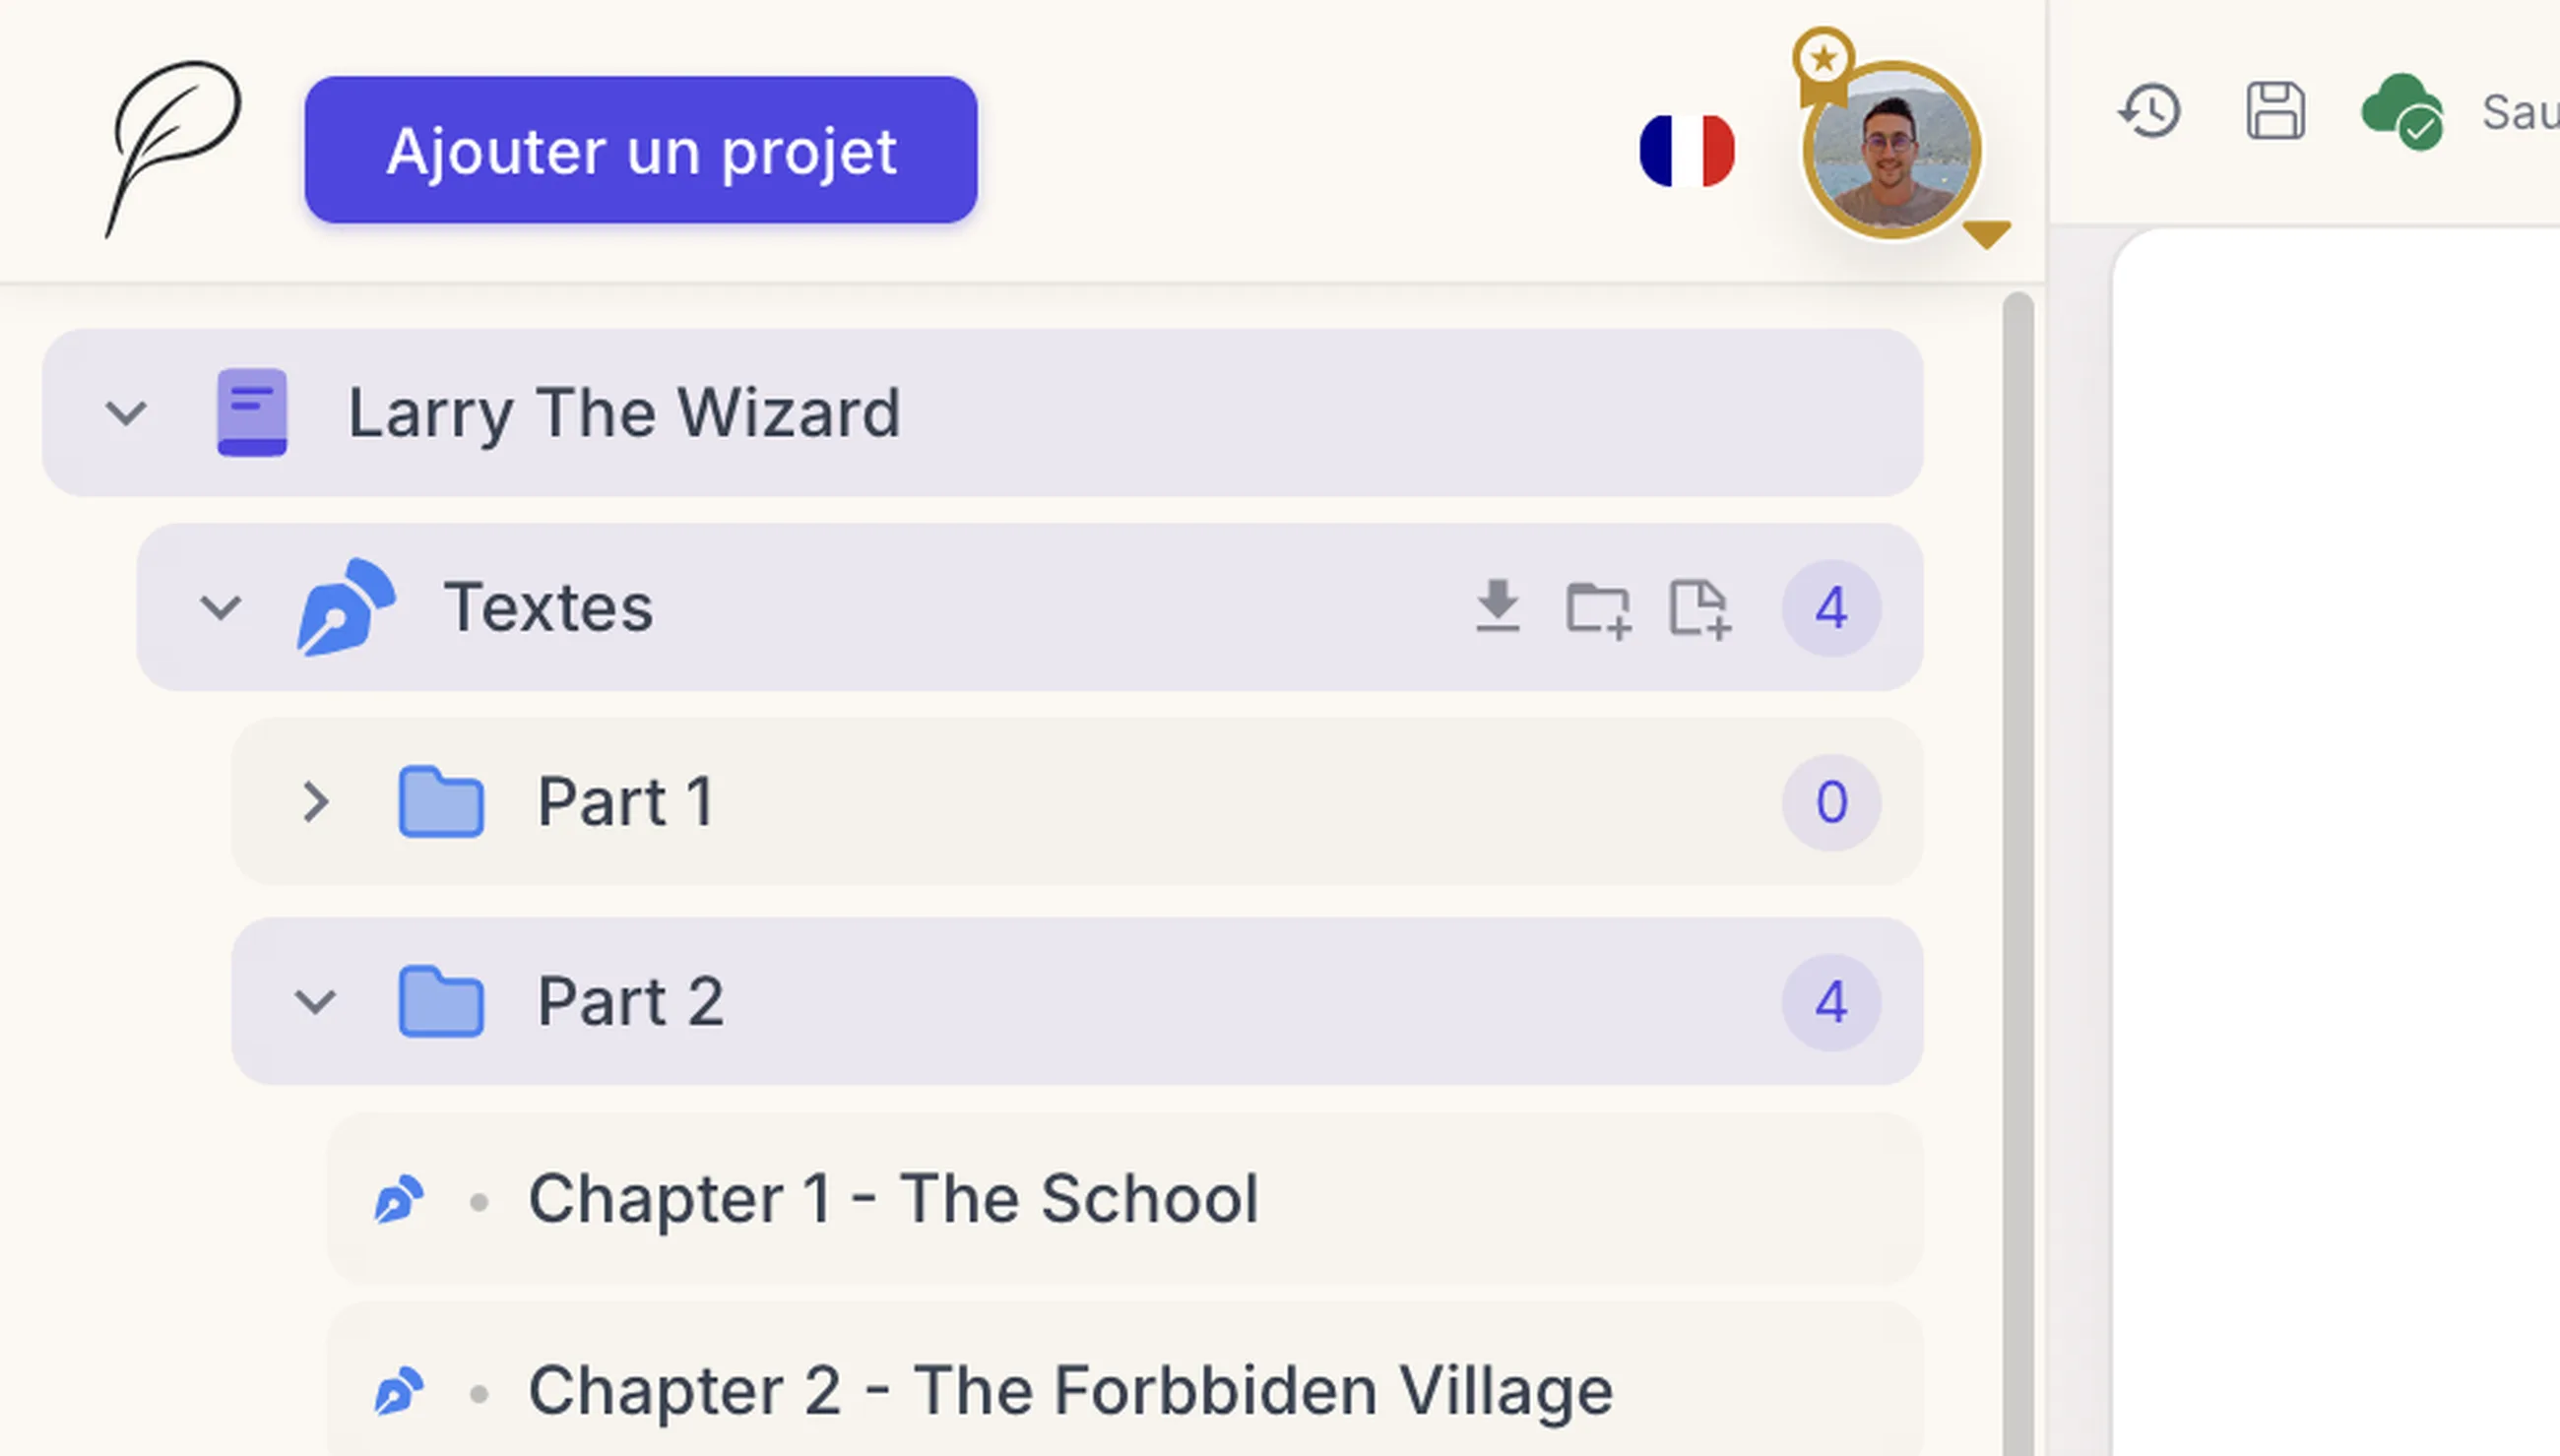
The left column is the entry point for the entire structure of your work. This is where you create a project and then develop its internal organization.
In the chapter section, you can create a new chapter or a folder. Every new item appears immediately in the tree with a temporary name, and can then be renamed directly. This avoids making you go through a long chain of screens: you create, you see the item appear, and then you adjust its name right away.
Chapters can live at the root of the project or inside a folder. This makes it possible to organize a manuscript by parts, acts, narrative blocks, or any other structure that suits your process. If you simply want to separate a few major sections, a first level of folders is often enough.
Plumelisse goes further with chapter subfolders, but there is an important distinction here: creating chapter subfolders is part of the Premium features. In other words, a standard account can structure a project, but deeper multi-level hierarchy is reserved for Premium.
The left column is not only for filing things away. It is also where you open a chapter, move through your folders, and launch an export for a single chapter, a chapter folder, or the entire project.
3. The central area becomes active when a chapter is selected
The center of the screen is deliberately dedicated to text. As long as no chapter is selected in the tree, the editor stays inactive. As soon as a chapter is opened, it becomes your main writing space.
The editor lets you write the chapter content directly and apply the formatting options available in Plumelisse: bold, italic, strikethrough, lists, part title, and chapter title. The idea is not to provide an overloaded word processor, but a space that is rich enough to structure a manuscript properly.
While you write, the application handles autosave. So you are not working in a form-based logic where you need to save everything manually: the text evolves inside the current chapter, and Plumelisse records the changes in the background.
Premium users also have access to their text version history, so they can restore previously saved versions when needed.
4. The right column complements the current project and chapter with notes and characters
The right column is built around two tabs: Notes and Characters. It always relies on the current project and, when a chapter is selected, it also uses that context to sort what is shown to you.
In the Notes tab, Plumelisse distinguishes between two levels. On one side, you find notes linked to the current chapter. On the other, you find the project's global notes. This distinction is useful because it prevents a local remark about one scene from being mixed together with information that applies to the manuscript as a whole.
Notes are created and edited directly in the right column. Their content can be modified inline, with autosave. You can also link a note to the current chapter, or remove it from that chapter if it needs to become global again.
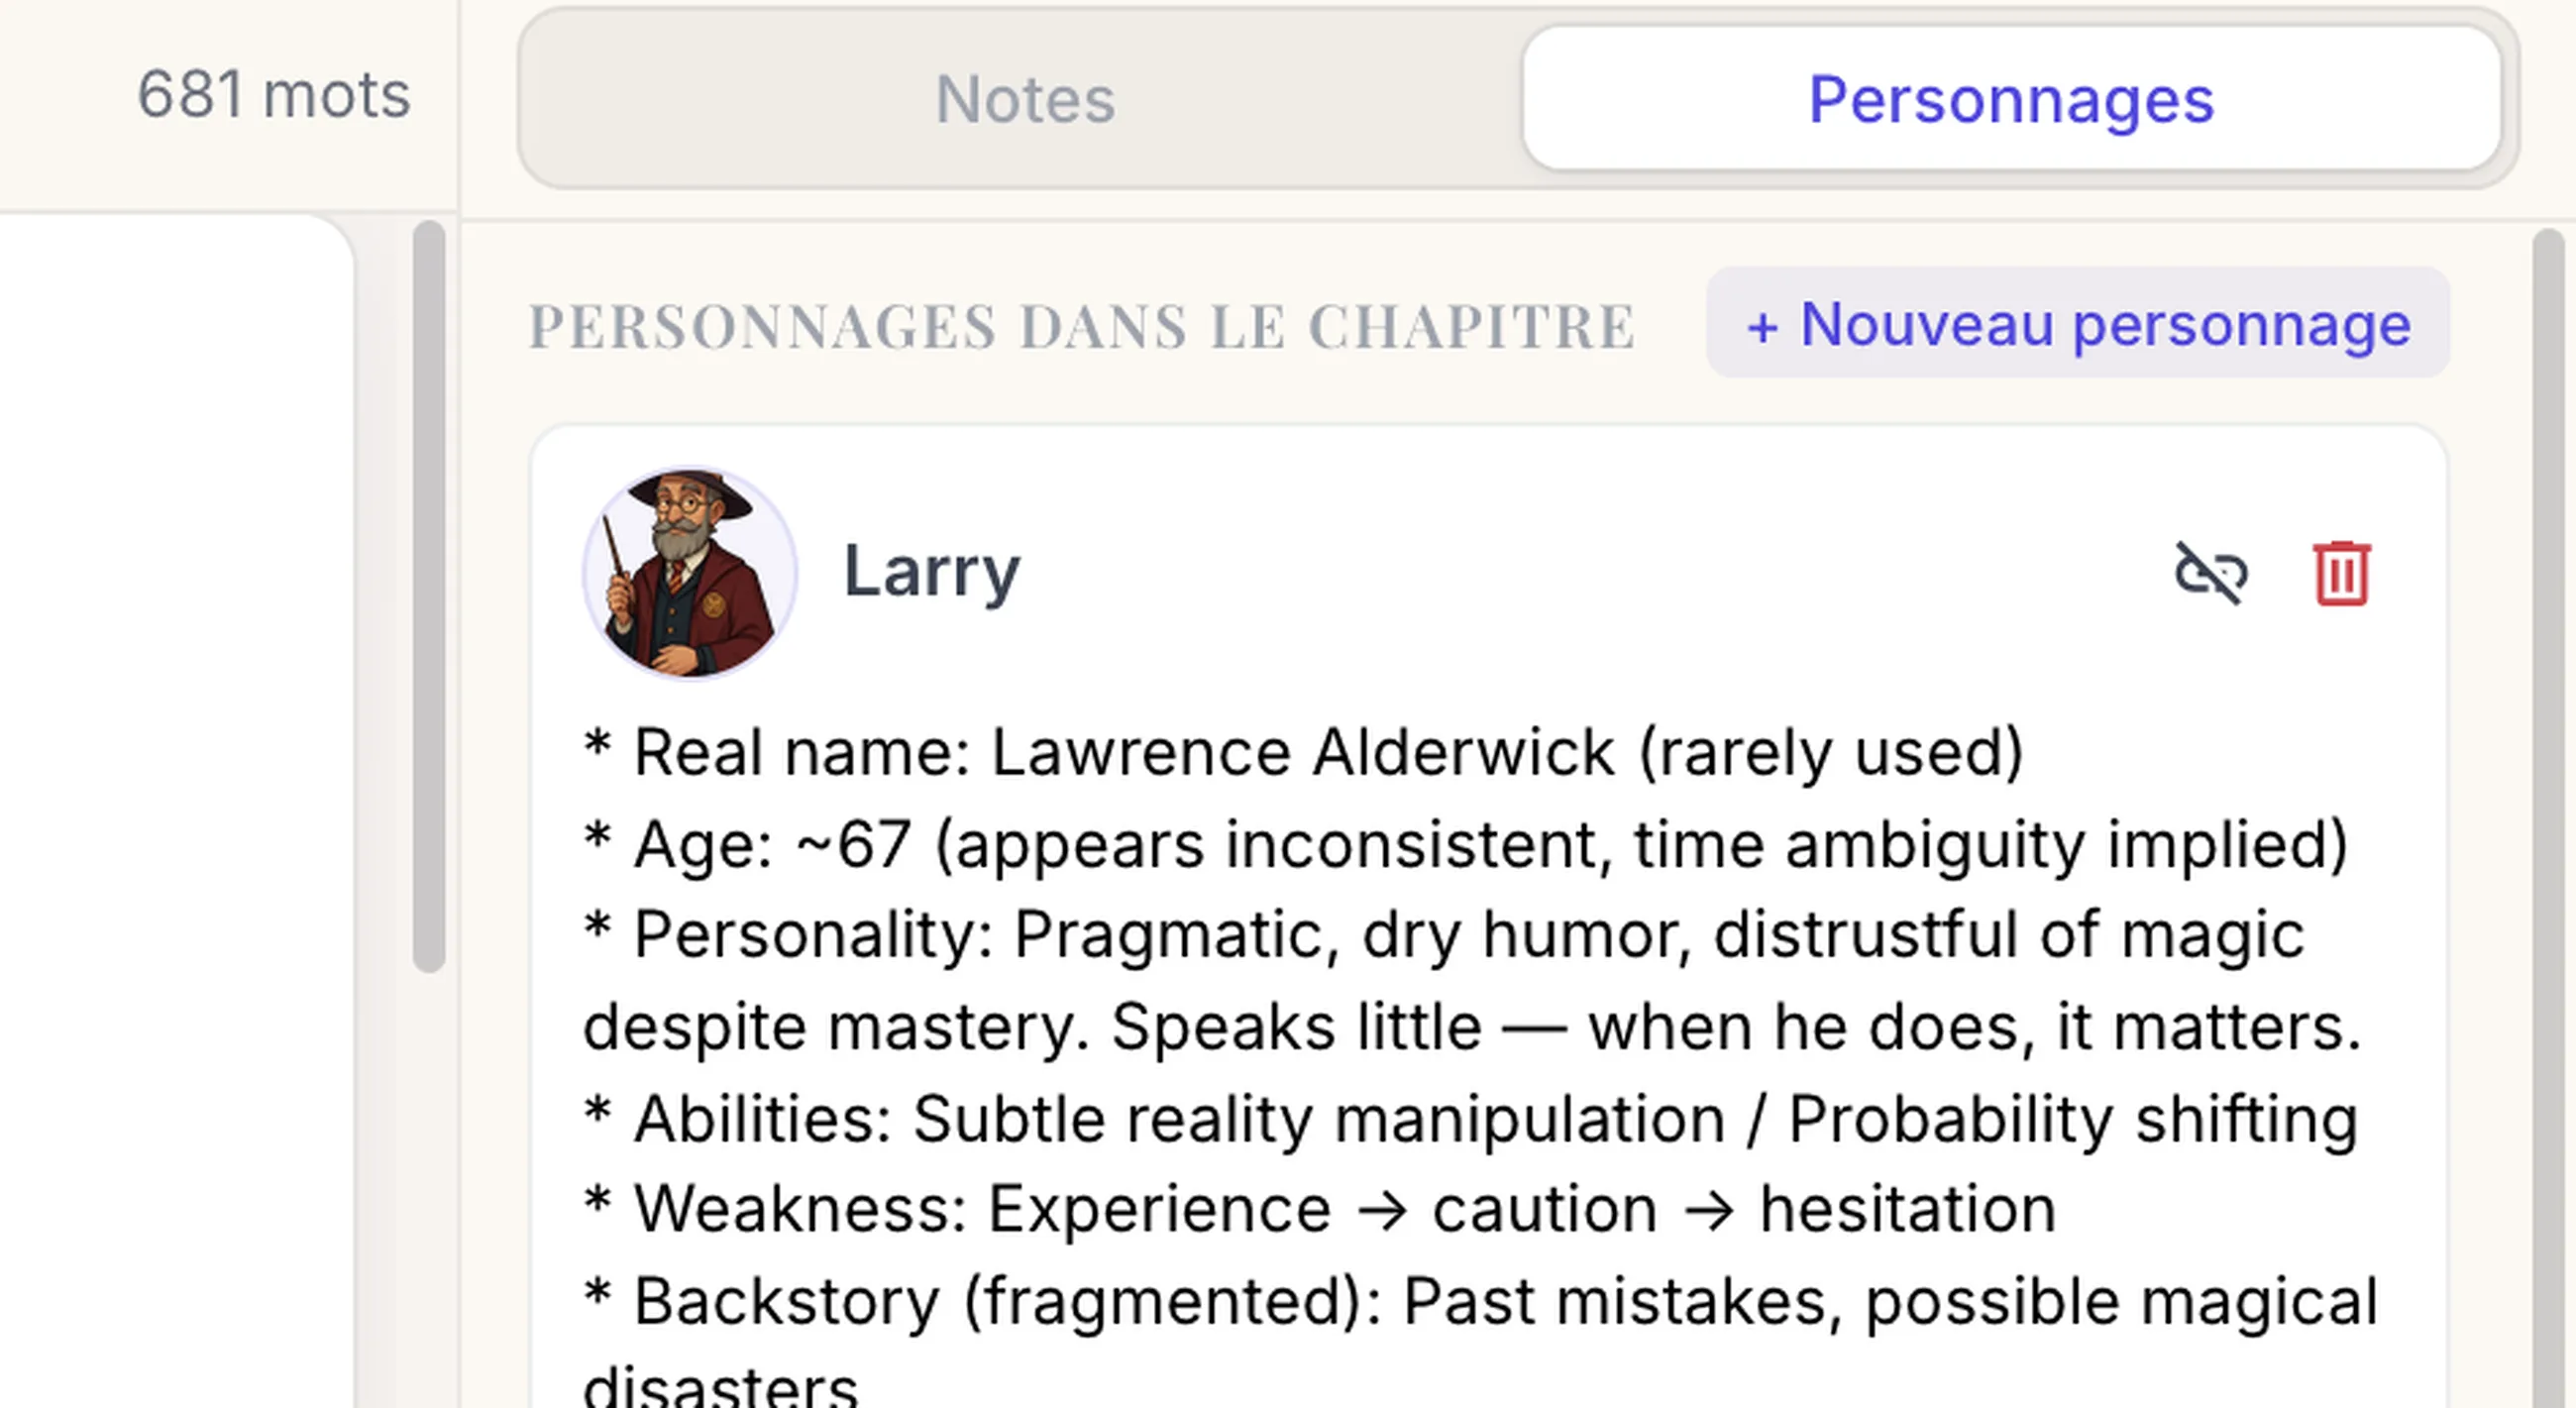
The Characters tab follows a similar logic. It shows the characters linked to the current chapter, then the ones that belong to the project without being associated with that chapter. Here again, you can create a card, edit its name and description directly, then link or unlink the character from the selected chapter depending on where they appear.
You can also add a photo to each character to make the cards more visual. This image feature is reserved for Premium members.
5. The timeline turns chronology into visual elements
The timeline sits at the bottom of the interface and belongs to the current project. For greater flexibility, it does not impose a real calendar: Plumelisse works with numbered positions. It is up to you to decide whether those positions represent days, milestones, years, or simple narrative markers.
When you create an event, you first enter a title and, if needed, a description. Then you define its type through the way you fill it in:
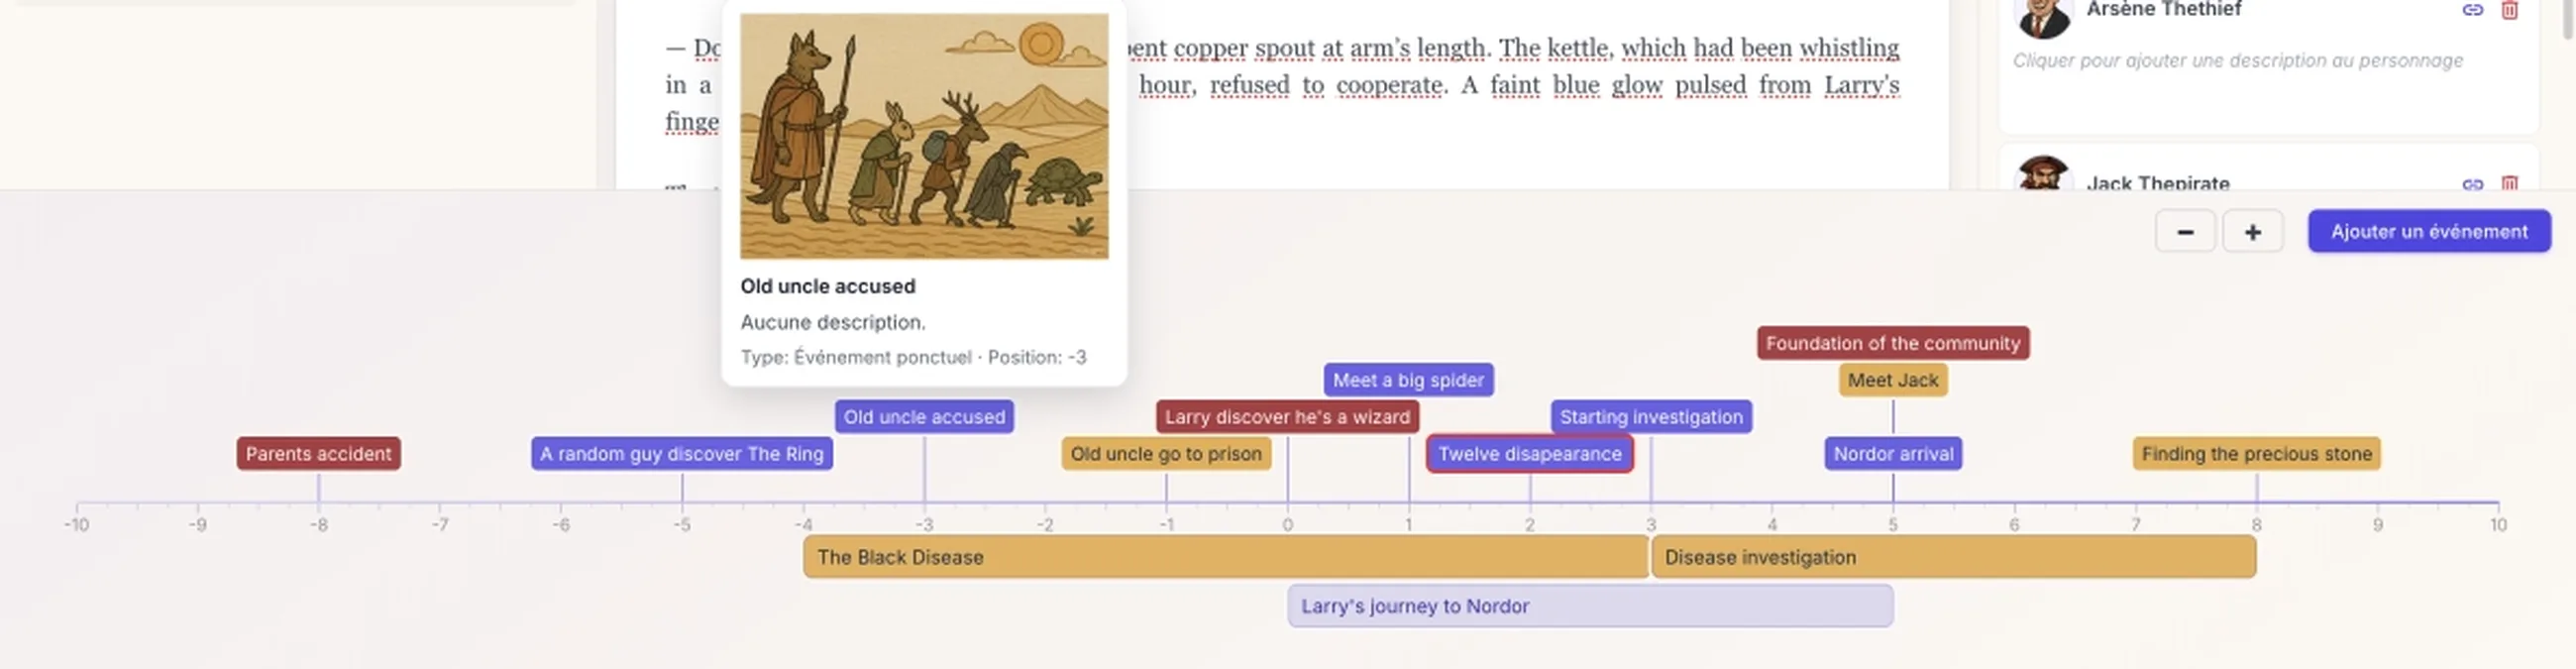
That difference is immediately visible in the display. Point events appear above the timeline as milestones. Duration events appear below it as extended bars running from a beginning to an end.
An event can also be linked to a chapter, which helps connect chronology and text. In practice, that link is mainly designed for point events. When you open an event's detail view, you will find its type, its position or duration, its description, its possible link to the current chapter, and its illustration if one exists.
Plumelisse also includes an importance level with three values: low, medium, and high. This importance affects how strongly the event is visually emphasized on the timeline, but editing it is reserved for Premium. The same applies to event illustrations: adding an image is part of the Premium features.
6. Exporting your texts
Plumelisse offers an export feature specifically designed to meet publishing expectations. Layout, format, typeface, and related details are all meant to match the criteria commonly requested by publishing houses.
Export starts from the left column, on the tree items, through the export icon. Depending on where you click, you are not exporting the same scope:
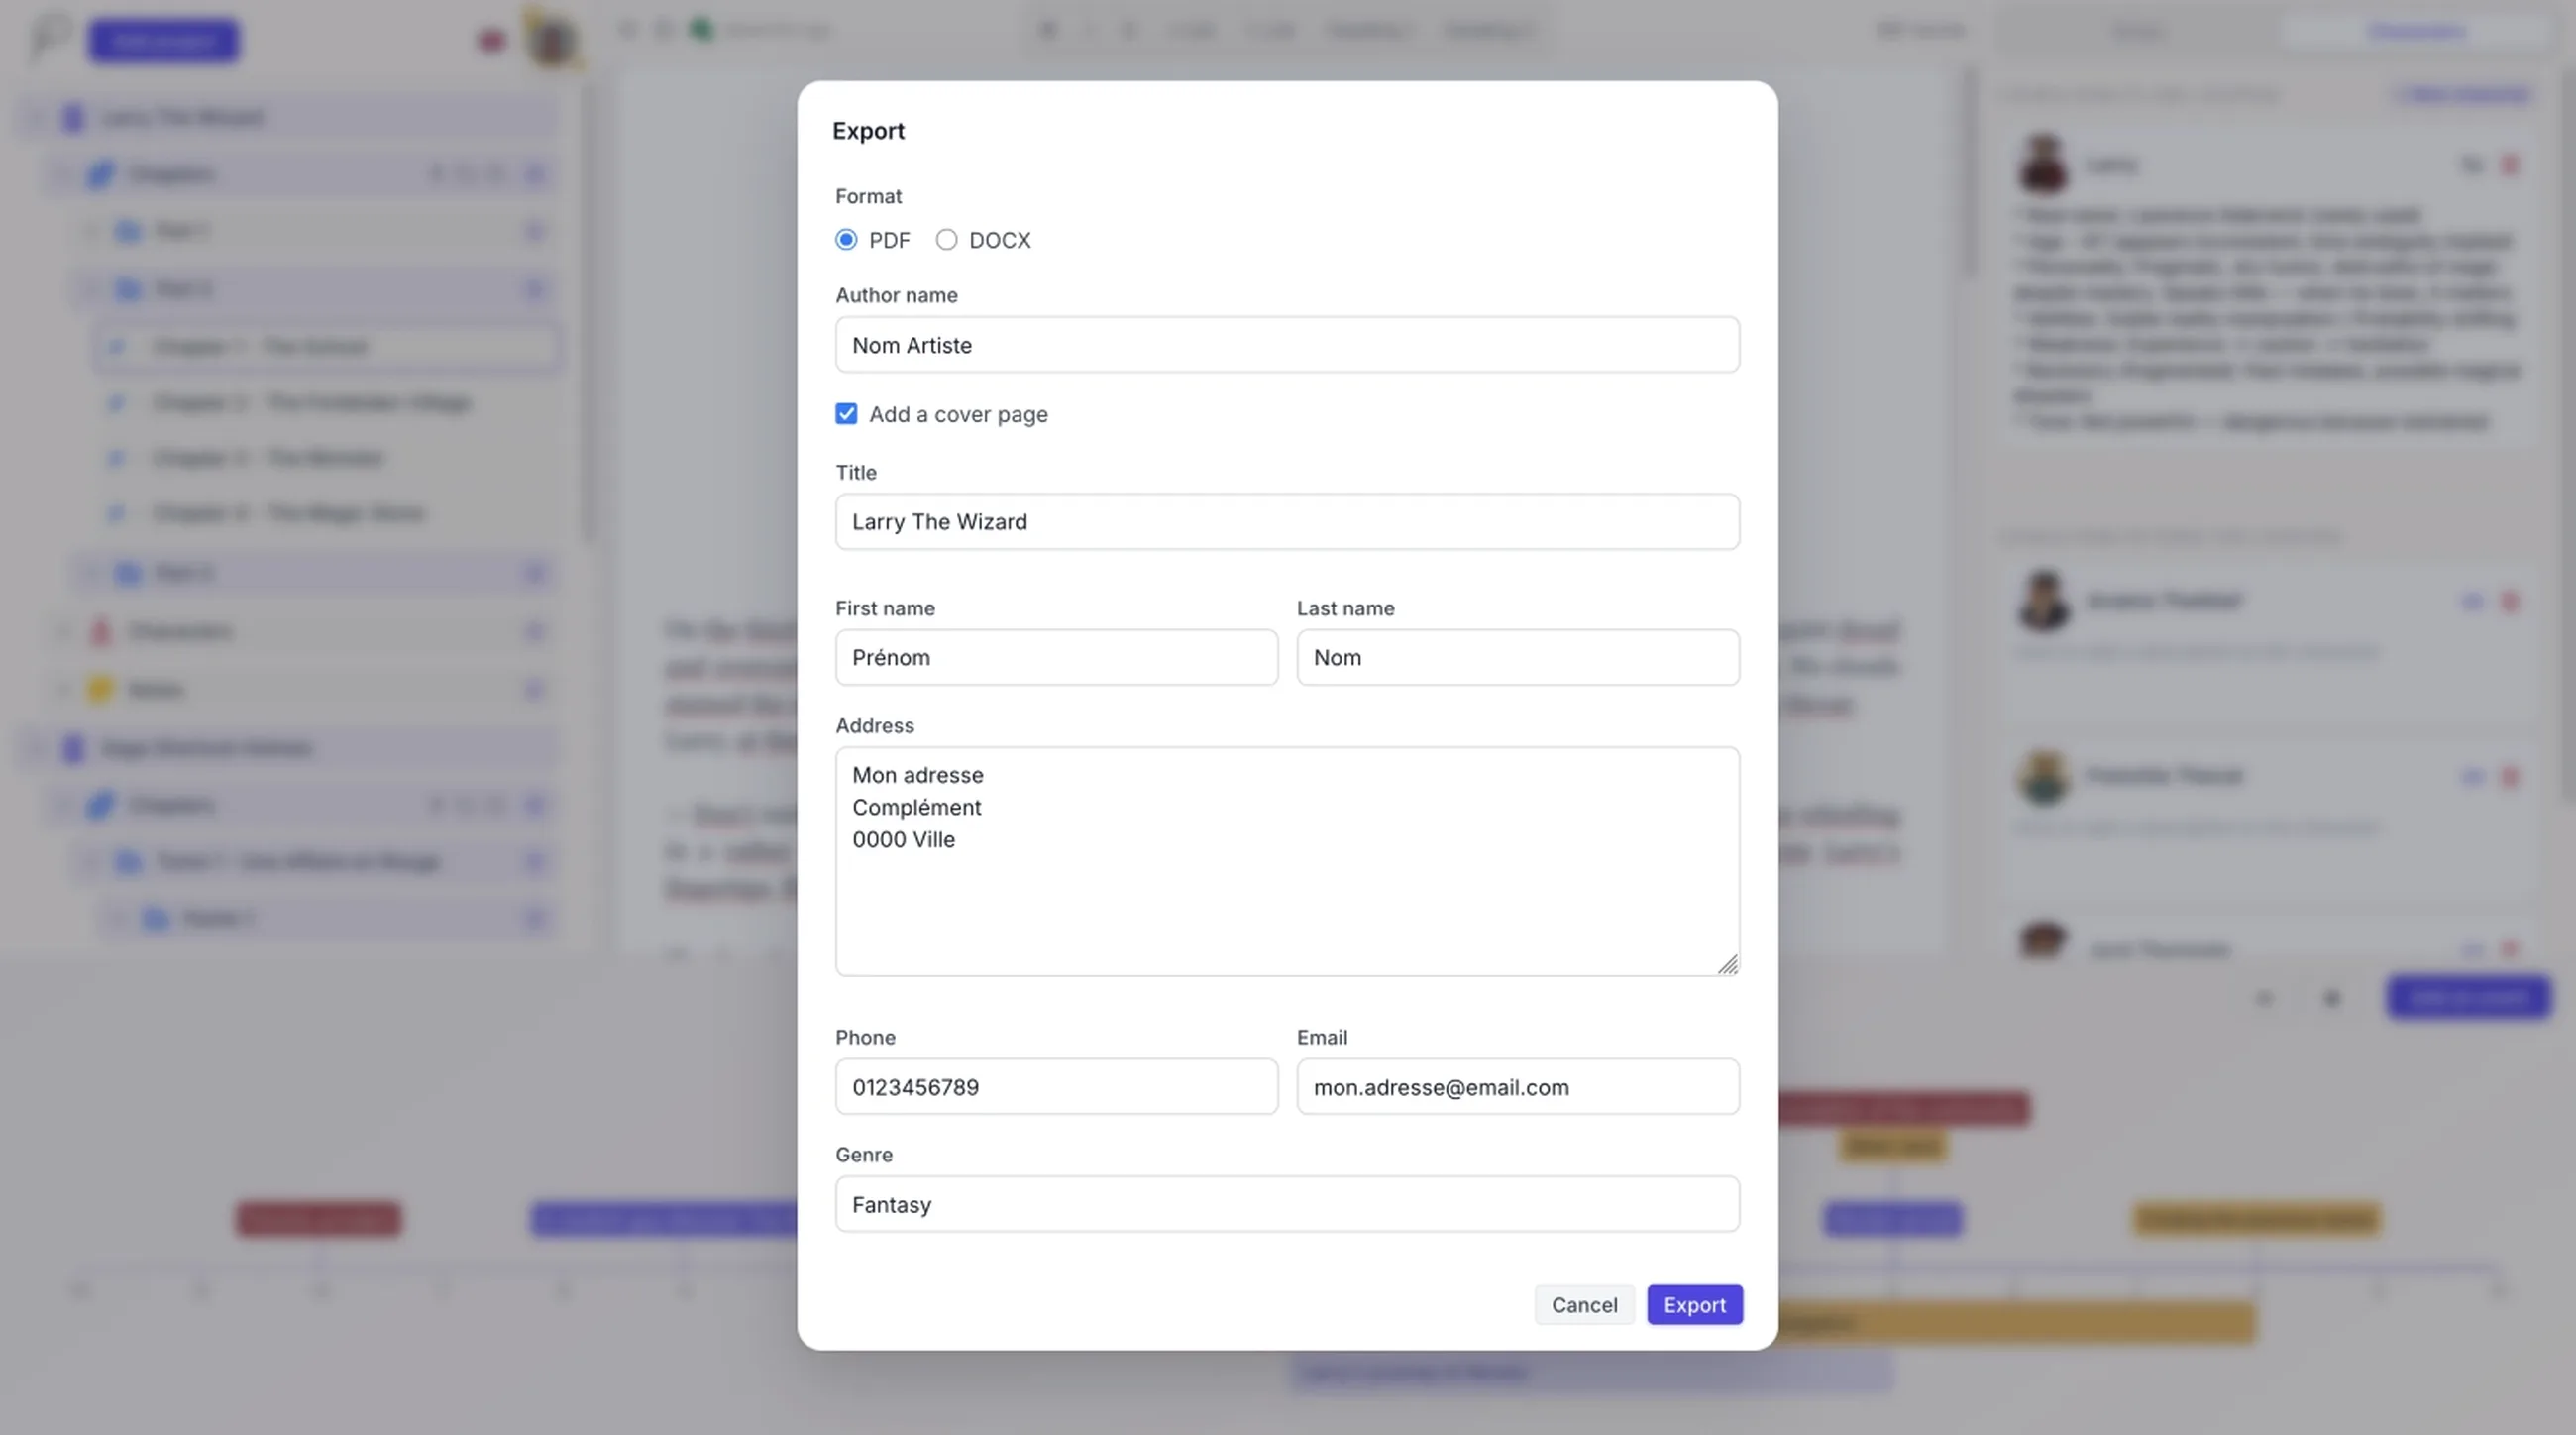
An export window then opens so you can choose the format, PDF or DOCX, and add the author's name if needed. If the export concerns a folder or a full project, Plumelisse also lets you add a cover page with several details such as title, first name, last name, address, phone number, email, or genre.
The benefit is twofold: you export the right scope without leaving the project, and you get a document that preserves the text formatting in a usable format. One important note: PDF and DOCX export are part of the Premium features.
In summary
To understand Plumelisse, the main thing to remember is its overall logic. The left column builds the project tree. The center is where you write the selected chapter. The right column manages notes and characters in relation to that chapter or to the project. The timeline makes chronology visible. Finally, export retrieves a chapter, a folder, or the whole manuscript depending on the level you choose.
In other words, Plumelisse does not simply ask you to write inside a text field. The application organizes your manuscript as a living whole, where text, reference points, characters, notes, and chronology remain connected.
In other words, Plumelisse does not work like a simple blank page. The left column organizes your material, the center welcomes the writing itself, the right column helps you keep track of your reference points, and the timeline lays out the chronology. Once you understand that logic, the application opens up naturally.
1. Plumelisse is built around four areas
After signing in, you arrive in the main workspace. It is structured like this:
- on the left, your project tree;
- in the center, the editor for the selected chapter;
- on the right, notes and characters;
- at the bottom, the project timeline.
These areas are not isolated from one another. When you select a chapter in the left column, the editor loads that chapter, the right column adapts to that context, and the timeline can highlight events linked to that same chapter. That movement between the different areas is what defines how Plumelisse works.
2. The left column is where you build your project tree
The left column is the entry point for the entire structure of your work. This is where you create a project and then develop its internal organization.
In the chapter section, you can create a new chapter or a folder. Every new item appears immediately in the tree with a temporary name, and can then be renamed directly. This avoids making you go through a long chain of screens: you create, you see the item appear, and then you adjust its name right away.
Chapters can live at the root of the project or inside a folder. This makes it possible to organize a manuscript by parts, acts, narrative blocks, or any other structure that suits your process. If you simply want to separate a few major sections, a first level of folders is often enough.
Plumelisse goes further with chapter subfolders, but there is an important distinction here: creating chapter subfolders is part of the Premium features. In other words, a standard account can structure a project, but deeper multi-level hierarchy is reserved for Premium.
The left column is not only for filing things away. It is also where you open a chapter, move through your folders, and launch an export for a single chapter, a chapter folder, or the entire project.
3. The central area becomes active when a chapter is selected
The center of the screen is deliberately dedicated to text. As long as no chapter is selected in the tree, the editor stays inactive. As soon as a chapter is opened, it becomes your main writing space.
The editor lets you write the chapter content directly and apply the formatting options available in Plumelisse: bold, italic, strikethrough, lists, part title, and chapter title. The idea is not to provide an overloaded word processor, but a space that is rich enough to structure a manuscript properly.
While you write, the application handles autosave. So you are not working in a form-based logic where you need to save everything manually: the text evolves inside the current chapter, and Plumelisse records the changes in the background.
Premium users also have access to their text version history, so they can restore previously saved versions when needed.
4. The right column complements the current project and chapter with notes and characters
The right column is built around two tabs: Notes and Characters. It always relies on the current project and, when a chapter is selected, it also uses that context to sort what is shown to you.
In the Notes tab, Plumelisse distinguishes between two levels. On one side, you find notes linked to the current chapter. On the other, you find the project's global notes. This distinction is useful because it prevents a local remark about one scene from being mixed together with information that applies to the manuscript as a whole.
Notes are created and edited directly in the right column. Their content can be modified inline, with autosave. You can also link a note to the current chapter, or remove it from that chapter if it needs to become global again.
The Characters tab follows a similar logic. It shows the characters linked to the current chapter, then the ones that belong to the project without being associated with that chapter. Here again, you can create a card, edit its name and description directly, then link or unlink the character from the selected chapter depending on where they appear.
You can also add a photo to each character to make the cards more visual. This image feature is reserved for Premium members.
5. The timeline turns chronology into visual elements
The timeline sits at the bottom of the interface and belongs to the current project. For greater flexibility, it does not impose a real calendar: Plumelisse works with numbered positions. It is up to you to decide whether those positions represent days, milestones, years, or simple narrative markers.
When you create an event, you first enter a title and, if needed, a description. Then you define its type through the way you fill it in:
- if you provide a single position, you create a point event;
- if you add an end position, you create a duration event.
That difference is immediately visible in the display. Point events appear above the timeline as milestones. Duration events appear below it as extended bars running from a beginning to an end.
An event can also be linked to a chapter, which helps connect chronology and text. In practice, that link is mainly designed for point events. When you open an event's detail view, you will find its type, its position or duration, its description, its possible link to the current chapter, and its illustration if one exists.
Plumelisse also includes an importance level with three values: low, medium, and high. This importance affects how strongly the event is visually emphasized on the timeline, but editing it is reserved for Premium. The same applies to event illustrations: adding an image is part of the Premium features.
6. Exporting your texts
Plumelisse offers an export feature specifically designed to meet publishing expectations. Layout, format, typeface, and related details are all meant to match the criteria commonly requested by publishing houses.
Export starts from the left column, on the tree items, through the export icon. Depending on where you click, you are not exporting the same scope:
- a single chapter;
- a chapter folder with its subtree;
- the whole project.
An export window then opens so you can choose the format, PDF or DOCX, and add the author's name if needed. If the export concerns a folder or a full project, Plumelisse also lets you add a cover page with several details such as title, first name, last name, address, phone number, email, or genre.
The benefit is twofold: you export the right scope without leaving the project, and you get a document that preserves the text formatting in a usable format. One important note: PDF and DOCX export are part of the Premium features.
In summary
To understand Plumelisse, the main thing to remember is its overall logic. The left column builds the project tree. The center is where you write the selected chapter. The right column manages notes and characters in relation to that chapter or to the project. The timeline makes chronology visible. Finally, export retrieves a chapter, a folder, or the whole manuscript depending on the level you choose.
In other words, Plumelisse does not simply ask you to write inside a text field. The application organizes your manuscript as a living whole, where text, reference points, characters, notes, and chronology remain connected.